Category: Tutorials
Action Sketching: How to put more action into action sketching
Pay attention to the twist of a human torso when action sketching and less to formally studying its anatomy. While the torso has just two, non-moving main parts that rotate in conjunction with one another, that twist often dictates the force of movement.
The key to capturing motion in action sketching, then, is capturing how the torso twists and flexes between the chest and the pelvis. When you capture that movement, the rest of a body’s possible actions falls in place.
The following tutorial video by master illustrator Jim Lee, describes how torso twist drives the action. Following it, I’ll briefly summarize his recommendations.
My summary:
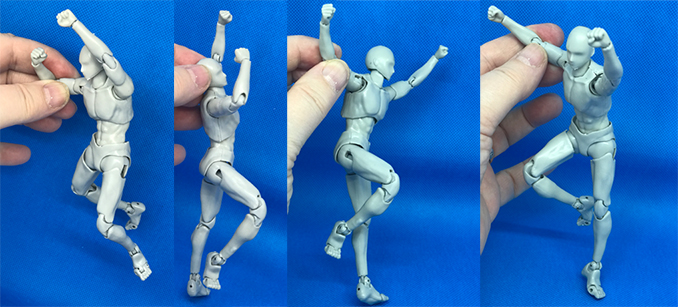
- Practice making “twisted” torsos (no extremities) as demonstrated in the video.
- After making numerous torsos, add appendages (legs, arms, head) to create imaginary poses.
- Compare your new torso-aware drawings to past sketches. Unless you are already a master like Jim Lee, I bet you’ll see a significant improvement.
Action models most certainly can inspire your imagination. Even without referencing a model, however, practice drawing torso twists should inspire your pose ideas.
In the example below, the bodies of the two figures are constructed from the same chest and pelvis shapes, but the one to the right is slightly twisted, causing its right leg to push back. The twist, then, dictated the position.
 Whether you are trying to draw action heros, depict an aspect of a sporting event, or are just doodling with form, when you focus on capturing torso twisting, the actions in your action sketches will be more pronounced!
Links:
- Jim Lee Video Tutorials: Mr. Lee generously produces numerous video tutorials on how to draw action figures. You can’t get a better online teacher!
- Jim Lee’s YouTube Channel
- Jack Kirby: Story Teller (Jack Kirby art) Full documentary: This plays in most browsers, despite a possible caution saying otherwise. Note that Mr. Kirby passed away in 1994.
- While Mr. Kirby passed away before YouTube video tutorials could be made, there are numerous tutorials on Jack Kerby’s style created by others familiar with his work.
- Google Image Search on Jim Lee’s Art.
- Google Image Search on Jack Kirby’s Art
Author:
This article was written by Karen Little as part of an ongoing series of blogs on Action Sketching. Published on Littleviews.com. February 2, 2020.
Reproduction of this article is free to non-commercial websites (or other media) with permission and attributes to Littleviews.com and the article’s author.
All material on Littleviews (with noted exceptions) is copyrighted on the date of publication.
Questions? Ask Karen Little at karen@littleviews.com.
Support Our Mission:
Please visit our Sketch-Views Gift Shop to purchase our illustrated products for yourself or as gifts. For an $80 order or more, we will create something for you. Ask about our fund-raiser program, too!
Action Sketching: How to draw abstract hands
There are numerous, very generous tutorials on the web that teach how to draw anatomically correct hands, but unless you are creating formal portraits, often it is what you don’t see that shapes the perception of what is going on. Frequently, portions of hands and fingers are hidden, either behind something, like a sports ball, or they are just to small to be seen clearly.
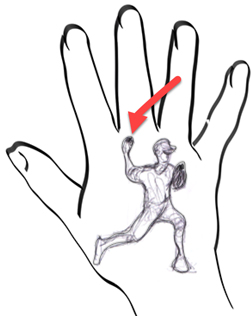
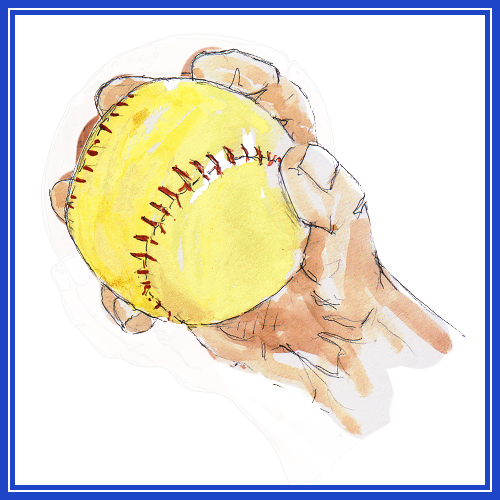
To demonstrate how tiny hands can be in a drawing, I sketched a pitcher inside of a full-size trace of my own hand. You might think his right hand is about to throw a ball, but it is your imagination, not your eyesight that informs you. Although in my last blog I did show a detailed drawing of a hand holding a softball, even in that picture, your imagination informs you what that hand looks like behind the ball and not anything I expressly showed you.
 When sketching characters in action, abstract images become the key ingredients of suggested reality. Rather than worry about hand anatomy, make sure the general shapes you draw suggest what you want your viewers to see, then trust their imaginations to fill in the rest.
Jim Lee, a highly regarded comic-book artist, writer, editor, and publisher, produced the best tutorial on the subject of abstract hand shapes I’ve ever seen! Use the tips shared in the following video and you’ll never have trouble drawing active hand motions again.
In my next blog on action sketching, I’ll again turn to Jim Lee’s advice on how to show body motion without too much concern about anatomy. If you use a fully-jointed mannequin, as suggested in Action Sketching: A supplies list, you’ll get even more out of that lesson.
Links:
- Jim Lee, biographical information: DCComics.com
- List of Jim Lee’s tutorials on YouTube
- Jim Lee on Facebook: If you are not already on Facebook, if you are serious about action sketching, Jim Lee’s fan page is a good reason to join
Author:
This article was written by Karen Little as part of an ongoing series of blogs on Action Sketching. Published on Littleviews.com. January 22, 2020.
Reproduction of this article is free to non-commercial websites (or other media) with permission and attributes to Littleviews.com and the article’s author.
All material on Littleviews (with noted exceptions) is copyrighted on the date of publication.
Questions? Ask Karen Little at karen@littleviews.com.
Cartoon Sketching: Draw borders around felt-tip marker sketches
A quick way to make funny images is to quickly draw something with a felt tip marker, then draw borders around the boundaries made with your felt tips. Here’s an example of how to start:
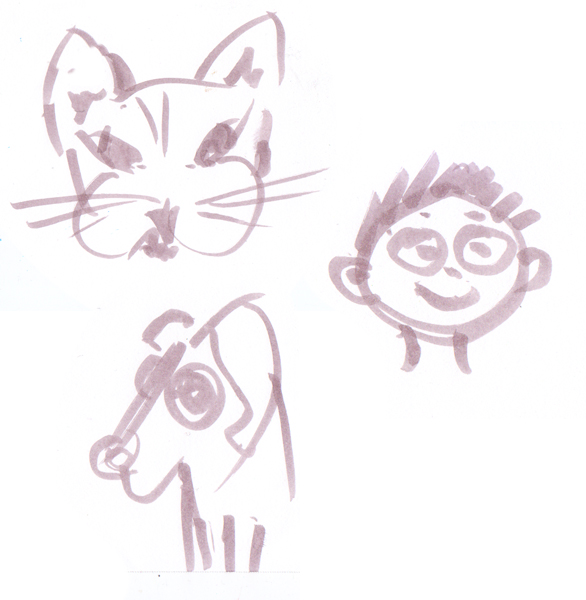
The first step in this process looks very weak, but when you sketch around the lines you made with the felt tips using a black pen, suddenly the images come alive.

Here is another example. Loosely make your cartoon figures, then draw borders around your lines. Easy and fast to do and the borders give your images a chunky finished look.
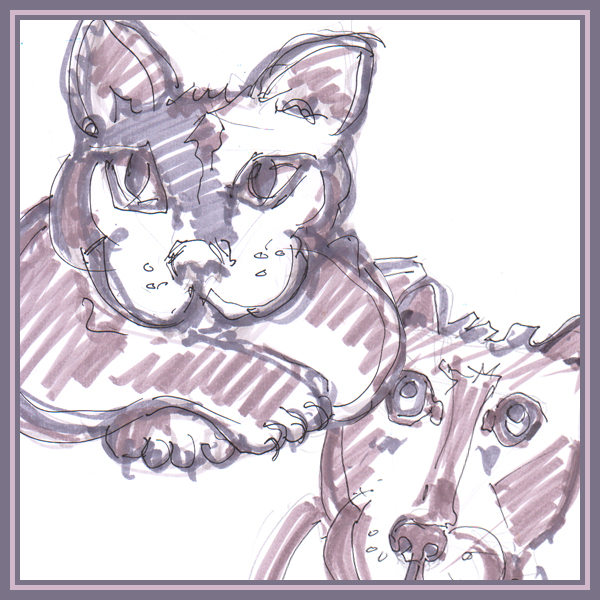
This method can also be used to enhance kids drawings. Depending on how busy the original drawing is, outlining the outlines can give a simple drawing the look of a poster.
Support:
Our mission is to help people love what they sketch and encourage them to share their sketches, sketch often, and do so with others. It is supported by our gift center on Sketch-Views.com, with products like the one you see at the bottom of this page. Would you like to have us create a custom illustration for you? Just ask!
Author:
This article was written by Karen Little as part of an ongoing series of blogs on Cartoon Sketching. Published on Littleviews.com. January 21, 2020.
Reproduction of this article is free to non-commercial websites (or other media) with permission and attributes to Littleviews.com and the article’s author.
All material on Littleviews (with noted exceptions) is copyrighted on the date of publication.
Questions? Ask Karen Little at karen@littleviews.com.
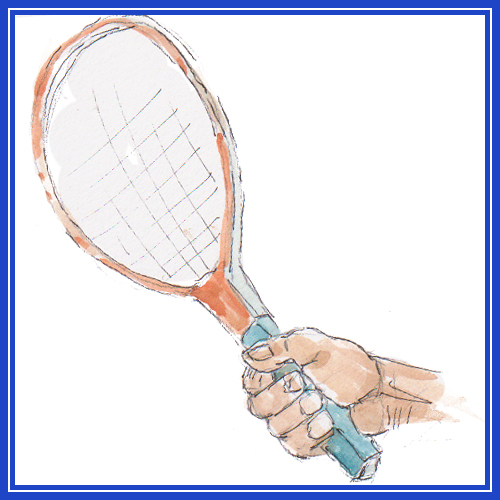
Action Sketching: Hands holding sporting equipment
While learning the anatomy of hands is very useful, when drawing action figures, rarely are hands empty or leisurely posed. Instead, hands curl, splay, and are often wrapped around something.
This tutorial shows how to view and ultimately draw hands holding equipment even though you might be too far away from their action to actually see them.
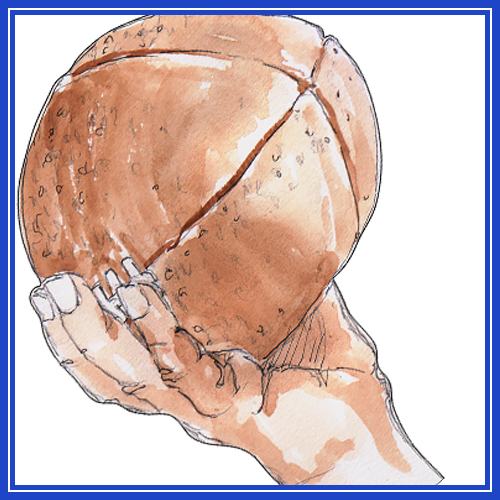
Like with drawing full bodies in action, hands can be interesting subjects themselves. They hold poses generally no one sees unless they watch ultra slow-motion video or see photos.
 Likewise, the only way you’ll ever know what hands do is to refer to photos as videos seldom refer to them.
To build your own reference library, attend games or practice sessions and take close-up photos of people holding equipment. If you need to capture hands holding baseballs and bats during, say, basketball season, however, visit a sporting goods store with a friend and take picture there.
Make an effort to organize your photos. Review them prior to attending a game if you plan on sketching while you watch the plays. Your memory of what you saw will help you capture what “is” that you can’t really see.
My next Action Sketching blog will be how to create abstract hands when sketching full body action where hands are simply a fractional part.
Links:
Note that most online tutorials specialize in drawing empty hands in various positions. The information is very useful but relies on you having to imagine an anatomically correct hand holding something.
-
Drawing a Perfect Fist – HANDS in Action!!! This is a fairly sophisticated tutorial that includes a video and still, sketched pictures.
-
Gripping Tutorials on How to Draw Hands: This is a comic-book-like tutorial created by several artists which covers basic anatomy and abstraction.
Author:
This article was written by Karen Little as part of an ongoing series of blogs on Action Sketching. Published on Littleviews.com. January 15, 2020.
Reproduction of this article is free to non-commercial websites (or other media) with permission and attributes to Littleviews.com and the article’s author.
All material on Littleviews (with noted exceptions) is copyrighted on the date of publication.
Questions? Ask Karen Little at karen@littleviews.com.